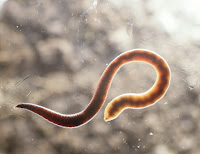
Trials and tribulations...
well..im working on a new ball of worms and theres been some interesting developments...
the worms...
i took the old geometry from max in obj format and decided i could improve in it in Houdini - the ends of the worms in max had some 'bogeys' due to bezier handles being present and the fact that i told max to create the geometry in the spline object itself.
in Houdini, i used partition and connectivity to create a group for each worm, then i deleted all the worms except one, then rebuilt the group with a copy SOP - an awesome technique first shown to me by one of David Gary's old video tuts - the particles flowing along the l-system.
this way - all operations applied to the one remaing worm can also be applied to the entire list of groups / of worms :)
i grouped a bunch of co-linear - in worm space :) - points by using group by range, and then made a new spline from this, then swept new worms after re-sampling the spline giving me much cleaner worms...the obj was much too high in res.
then i decided to add a ring slightly fatter around the middle - see the pic ? and this was done by extruding - which was not good for the UVs - likewise i capped the open ends of the polys - bad for proceduralism and UVs. There was also a UV errorof some sort ruining my renders.
so today i went about solving these issues and opened up a can of well.....worms :|
my proc method of selecting the ends had to be scrapped - i made groups for the first and last point of the splines the swept the worms - proc ok - but then after copying spheres to these points i wasnt really cleanly selecting points or prims for extrusions or capping.
the sweeping itself also had to be redone unfortunately - as did the UV mapping - but uncovered some interesting techniques. The UVs were made with Rob K's (meshsmooth) unfold curve SOP
which looks at the angle of segments on the curve and then applies that same angle as a rotation to the specific segments and thus straightens out the curve. With the same method used for the backbone curve - a sweep with give you a flat plane which can easily be mapped - these UVs can then be transferred to the same sweep (with curly cuves) thus mapping the worm.
I also decided to go to town with the image and add some rain and all the water FX that would go with it - rain splashing against the ball of dirt and trhe worms and causing mud, and water dripping off the worms and bouncing around on the set / cyclorama. Joy...more cans of worms !
closest render I have to the original houdini render:


No comments:
Post a Comment