Search This Blog

Blog Archive

Friday, March 28, 2008

weekly research : DOF


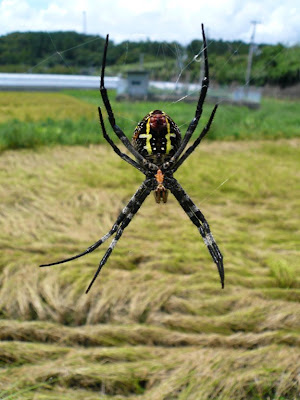
spider from Nakamura, Japan. 2007.
the spider is more in focus than the road or background foliage
Im no photographer - but i think the focal point was somewhere in between the spider and the camera - as the spider is non as sharp as it could be.

in Houdini : try lowering your F-Stop to increase Blur for DOF effects
eg:


addendum:

from Side Effects website:
hscript expression for distance from cam to null)

vlength(vtorigin("/obj/path_to_camera", "/obj/path_to_null"))
 
from exhelp:
 
vector vorigin (string obj1, string obj2)
        Returns a vector of a objects's transforms.
        
        This function will return a vector with 6 values in it. The values are
        set to "[TX, TY, TZ, RX, RY, RZ]" for the position of obj1 relative to
        obj2.
        
        This can also be thought of as the position of obj2 relative to obj1.
        
        If the empty string ("") is specified for either obj1 or obj2, then
        the identity transform will be used instead.  For example, if obj1 is
        the empty string, then the world space position of obj2 is returned.
        
vtorigin (string obj1, string obj2)
        Returns a vector of an object's translations.
        
        This function will return a vector containing the translates required
        to transform obj1 to the space of obj2.
        
        This can also be thought of as the position of obj2 relative to obj1.
        
        If the empty string ("") is specified for either obj1 or obj2, then
        the identity transform will be used instead.  For example, if obj1 is
        the empty string, then the world space position of obj2 is returned.
        
        
        RELATED
          origin
          vorigin
          vrorigin
          originoffset

in my efforts to learn more about the world of digital fx - i thought id try and document some stuff weekly.

tonight some DOF

links

luminous-landscape.com
online DOF calculator
Retouchpro.com
Google
Wikipedia
Large Format Photography

what do i already know ?

  • it greatly enhances realism in cg.
  • it can be slow to calculate in cg- it definitely has been slow to calculate so far in my experience with 3DSmax (3D DOF ?) .
  • there are cheats - blurring with z-depth has been my solution for most my personal work so far.
  • it has a range. the distance from the subject to the camera and the camera lens settings determines if the subject falls within the focal range. if it is outside of the focal range - it will be blurry.
terminolgy (from luminous-landscape.com)

CoC - circle of confusion

the circle of confusion is is the diameter of a 'sufficiently small' blurspot.

A photograph is perceived as acceptably sharp when the blur spot is smaller than the acceptable circle of confusion. The size of the “acceptable” circle of confusion for the original image (eg film) depends on three factors:

  1. Visual acuity - quality of individuals eyesight - may be impaired by environment.
  2. The distance at which the final image is viewed.
  3. The enlargement of the final image from the original image.
the photography industry has agreed that the smallest distance the human eye can discern is 1/6th of a mm or .1666' mm.

it also figures that for DOF the typical magnification of enlargement from neg to print is 5x
so 1/6th of a mm div by 5 for the neg is .0333' mm - this is the "Circle of Confusion" that many 35 mm lens manufactures use when making their lenses. it is a circular shape because of the nature of the lens.

a definition of DOF

"The area in front of and behind a focussed subject which stays sharp in the photographic print."

this should be "The area in front of and behind a focussed subject which stays sharp in the photographic print - within the limits of the applied COF."

DOF is also the far focal point distance minus the near focal point distance.

one of the laws of optics seen in DOF tables is that the DOF extends one third in front of the subject and 2 thirds behind it. This means there is twice as much DOF behind a subject as there is in front of it.

the Hyperfocal Distance

the hyperfocal distance is the nearest DOF distance at which the DOF can extend to infinity.
focussing the camera at the hyperfocal distance enables the largest possible DOF for a given f-number. Focussing beyond the hyperfocal distance will not increase the DOF but actually decrease it or 'waste it' as some photographers say. The far focal point is staying the same - at infinity - but the near focal point is moving further away - so the focal distance is getting smaller.

from wikipedia:

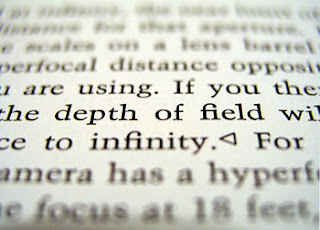
although a lens can only focus on one point - the falloff of focus is gradual on either side of the focal point.
What is the science behind it ?
from :
www.dofmaster.com/equations.html

  • hyperfocal distance
H = f^2 / Nc + f

f is the lens focal length in mm - everything should be in mm
f^2 is f squared
N is the f number
c is the circle of confusion in mm again.

to convert the H to feet from mm : divide by 304.8 and 1000 for m.


  • near distance of acceptable sharpness
D(near) = s(H-f) / H + s - 2f


  • far distance of acceptable sharpness
D(far) = s(H-f) / H - f

s = focal distance

see wikipedia's formulae for more detail

next week aberrations !


Thursday, March 27, 2008

some oddities - car paint shader

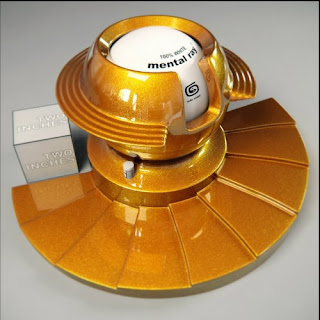
reference:note here the reflection seems to be tinted red.
the blue sky in the ref looks pink or purple - which means the red is affecting it

looking at this net work has raised a few questions.

how do i incorporate this into pbr ?

why does the exp vop only have one input ?

i looked into the help files for this.
i was thinking the exp vop would do what the power or pow vop does but it only has one input.

from wikipedia, you can express it as e^x where 'e'
(eulars number is approximately 2.718281828)

so putting in 2 to the exp vop would yield 2.7182... squared ?
better check.

i made a quick VOP sop and applied the exp VOP to the x coord on a small box.
by reading the node information - the min x bound on the box before the VOP sop was .05 and after was .1.05107 - which worked out the same using a calculator. well there ya go...what does it all mean im not sure yet. :D

Wednesday, March 26, 2008

shader break down...


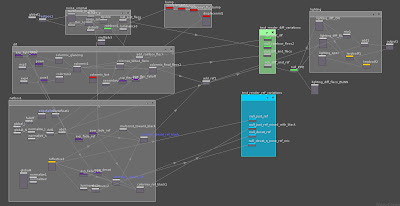
latest VOPnet:
this version is alot cleaner:

the red nodes arent being used - ie bump.

the green and blue netboxes are there so i can quickly test different combinations of the Vopnet - like just the reflection without the diffuse contributing for example - effctive just acting like a switch but a bit clearer to see whats going on from a glance - due to naming of nodes.

in this version i have different amounts off fallof for different elements - the reflection fades off differently to the the mix of colours and flecs contributing to the diffuse.

I used a power of .85 on the absolute dot product between the normal and viewing angle for mixing the diffuse colours - the blues.

.95 for mixing in the flecs
.75 for the reflection
.75 for the desaturation of the reflection


latest update:
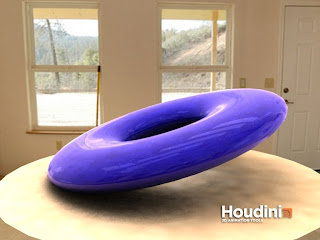
heres my latest efforts. ill keep everything in this post and add new images to the top.

now i have a HDRI image as bg.
this is also being used as a reflection
in additionto this - i also have some reflection cards - which arent in the pic - but you can see their reflection on my flattened torus -the white rectangles.

there is a GI light in the scene as well using the HDRI image to light the scene - this is the only light.

there is a disc to catch the shadow as well - this is shaded with a grey clay shader -- the colour (similar to the bg) is coming from the GI light and the image it uses.

the bg is visible due to a sphere with the HDRI (smaller jpg form) mapped to it.

id like to work on lots of aspects of this pic.

i feel the reflection isnt faded enough at the front of the torus - where the reflection should be minimal.

the HDRI isnt accurately reflecting on the torus - i may need to rotate the 'env sphere' around to match the bg with the reflection.

the paint flecs are too far apart and they dont seem to fade as surface rolls off to a perpendicular angle to the camera

the shadow is too grainy - more sample are needed in the GI shader
i can see the polys on the torus - more subDivisions needed for a smoother surface.

but for now i tihnk i will leave this for a while...and do some more HDRI testing and research.
after all - car paint shading is an exercise in realism - and HDRI lighting is good for realism.

maybe one more render :D
----------------------------------------------------------------------------------------------

every thing below here is older.


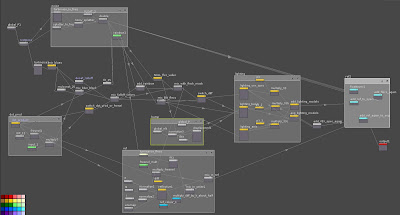
ok heres a break down so i can make a better one.

theres 5 main sections

  • noise /flecs
  • diffuse
  • fall off
  • lighting
  • reflection
noise flecs
these should be optional for mid / far shots

diffuse
at the moment - this is very simple and doesn't have its own netbox
i only consists of 2 shades of blue mixed with some noise and mixed in with a darker
version by the falloff output

falloff
basically i have two colours mixed together by the falloff.
the fall off itself is made with two methods
  1. the dot product VOP
  2. the fresnel VOP. currently the switch is set to use the fresnel as the input
(although - the fresnel VOP is itself using the dot product VOP as an input - which is probably set up wrong in my VOP net)

this falloff is used for several different things
  • mixing the diffuse colours
  • fading the reflection
  • fading the saturation of the reflected light - probably at a different rate
  • fading the saturation of the diffused light - probably at a different rate
ive tried to do this in 2 different ways in the same VOPnet as well which is probably also wrong.

lighting
i wasnt sure what to do here, so as an experiment - i have averaged
vex specular , phong, and anistropic lighting together ! :D why not - experimentation teaches !
but basically the light the viewer sees should be broken down to
  • diffuse
  • specular
  • reflected
  • bloomed
reflection
ive then simply added the reflection on after this
im not sure if this is right - or if it should be added before the lighting models - or if it even matters

in the reflection VOPS:
i have normalise VOPS for N and I going into a reflective VOP
if i connect the output to this reflective VOP - all i get is pure reflection
(NB the reflective vop doesnt need global variables put into it - it does this automatically)

this reflection is then mixed into a low-sat version of the diff map - just the blended
colours using the falloff as the mixer.

So how can i improve this ?
well for one there is some things just wrong here - why am i mixing in white ? i dont know...
:|
the network looks very spidery as well---which means its probably badly organised.
i could do some research...that comes next.

here's some reference, thank you Mr. Patton, great work !

Jeff Pattons Mental Ray Research


Tuesday, March 25, 2008

a car shader...attempt


ok...enough basics !

hers an attempt at a car paint shader..
istarted this a while ago in houdini 8 with alot less knowledege...
now is the time to push it further :D

displacement bounds

when using displacement -
you may see some rendering artifacts.

these can be cause by geometry displacing so that he new geometry is intersecting itself - imaging two seperate primitives facing each other and quite close to each other - if they - or their corresponding micro-polys are pushed out with displacement - the may 'collide' or intersect.

displacement bounds combats this by checking around the poly for potential intersection.
The higher the bound value (bounding area) - the more area is checked - therefore the more expensive it is, so it should be used at a minimum successful value.

to access this param (it used to be there in H8 but where is it in H9 ! ?)
go to the presets (the little cog) in the mantra node

insert example images here:

Monday, March 24, 2008

linux commands


how many files are in that directory ?
use ls | (pipe) wc (wordcount)

disk usage
df -h

kill houdini but save a crash file:
find the process id number
ps -e |grep houdini

or for centOS
ps -ef |grep houdini

kill it and save a file
kill -SEGV (process id number)

file permissions:
from www.linuxforums.org/security/file_permissions.html

r readable
w writable
x executable

u user
g group - ie Administrators
0 others - not a member of a group or the owner of the file
a all
- no permission

use ls -l to see file permissions

eg

ls -l myfile
-rwxr-x--- 1 george administrators 10 2006-03-09 21:31 myfile

so for george - the owner - the file is readable , writable and executable.
for other administrators - the file is only readable - not writable but still executable
other users cannot read, write or run this file.

changing permissions : chmodif george wanted to give write permission to the other administrators
he would type

chmod g+w (myfile)
To check your Ubuntu version using the command line:
  1. Open a Terminal (Applications -> Accessories -> Terminal).
  2. Type lsb_release -a and press Enter.
  3. The Ubuntu version will be displayed on the screen.

Friday, March 21, 2008

more shader experiments

now i feel im getting the hang of it...im going to replicate some of the looks i can see in max.
here's a list of the preset tools in max and their counterparts in Houdini.

one thing to note is that Houdini often bundles up displacement into its shaders
where as this is manual in max. - you mnust always plug something into displacement so you never get displacement by default.

another gotcha in H9 - sometimes in VOPs it apears as though your chaing parameters and nothing is changing in the shaderview...try spinning the view to force a refresh ! :D

Max material-------------------------------------Houdini Solution

Blend material ---------------------------------------mix (after specifying a lighting model)
composite ---------------------------------------------- mix or composite
Double sided ------------------------------------------2 Sided
Ink and Paint ------------------------------------------two tone with wren comp ? exp. fall off comp / edge detect comp.
Matte / Shadow --------------------------------------Matte
shadow ---------------------------------------------------not sure yet
(here the shadow object doesnt render but casts shadows)
morpher --------------------------------------------------mix with SOP groups
sub- object ----------------------------------------------material SOPS
raytrace --------------------------------------------------reflection VOP
Shell material (baked textures mixed in)---------done maually
shellac ----------------------------------------------------additonal lighting models
Top Bottom ---------------------------------------------mix with a vector bias

Max map --------------------------------------------Houdini solution

bitmap ----------------------------------------------------texture VOP
camera map -------------------------------------------per pixel camera mapping
cellular ---------------------------------------------------cellular noise
- with render parm multiplied by dist 2 parm
checker --------------------------------------------------checker
composite ----------------------------------------------composite
dent --------------------------------------------------------combination of noises
falloff ------------------------------------------------------edge falloff
Gradient ramps -------------------------------------use UVTransform
to rotate 90 degs in Z
gradient ramp ---------------------------------------spline VOP
see the fire VOP for an example
spiral and sweep ramps may have to be manually created with other VOPS
investigate this !

marble ----------------------------------------------------marble
but slightly different
mask -------------------------------------------------------mix with float input
noise -------------------------------------------------------anti-aliased noise
for turbulence- muiliply with marble.
output -----------------------------------------------------use invert VOP, clamp / floor / ceiling VOPs and for color map - use a HSV VOP
perlin marble -----------------------------------------combination of perlin noise and marble ? marble with p noise applied to the xy coords?
planet -----------------------------------------------------not sure on this one
smoke -----------------------------------------------------noise variation
speckle ---------------------------------------------------noise variation
splat -------------------------------------------------------splatter
stucco -----------------------------------------------------noise variation
thin wall refraction --------------------------------NApplicable
tiles ---------------------------------------------------------boxes
Vertex color --------------------------------------------Cd attribute
waves-------------------------------------------------------waves
wood --------------------------------------------------------wood

So it seems almost all of max's map / material types are also present in Hoiudini - thats good to know. The main exception would be a spiral gradient - but I can make this witha bit of sweat.

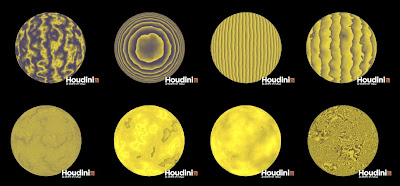
Houdini's extra VOPS:

displacement

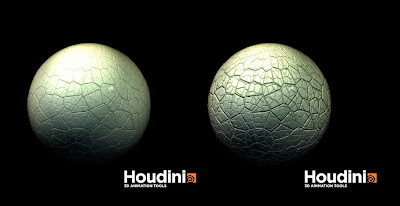
cell cracks
furrows
scales
waves

patterns

bricker
burlap
burplap pattern
cellular cracks
gingham checks
high-low noise
mandlebrot set

oscillations
periodic noise
rainbow

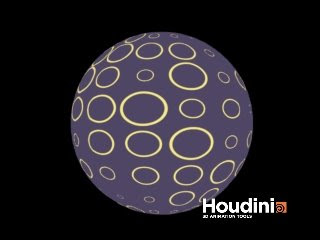
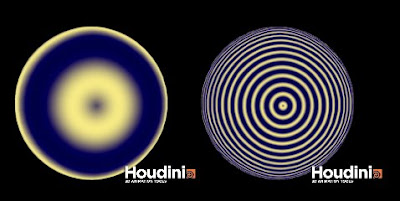
ringsripples


skin default
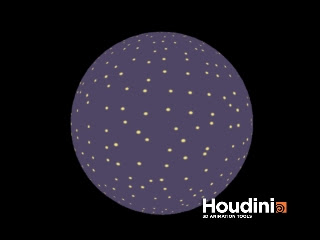
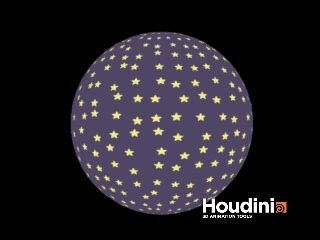
soft dots

rounded stars
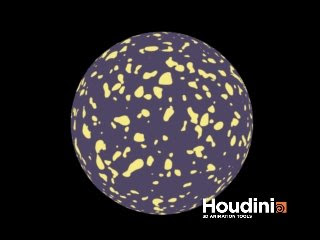
splatter
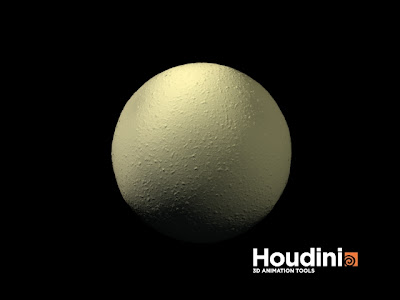
stucco
thin film - like a soap bubble.
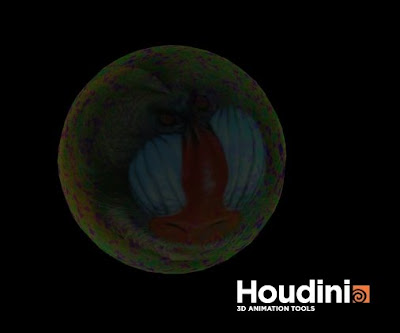
here ive specified the mandril as the reflected image.

two-tone

turbulent noise and some variations
veinsvoronoi noise

wire pattern
worley noise
woven

shiny metal playtime !


oooh...almost mother of pearl !


heres some experiments with the shiny metal VOP and anti-aliased noise in various inputs and combinations of inputs.

shiny metal with noise in the tint and rough inputs
noisy normals in tint, diff and spec
noisy normals and noise in the tint
noisy normals and noise in the diffuse only
noisy normals

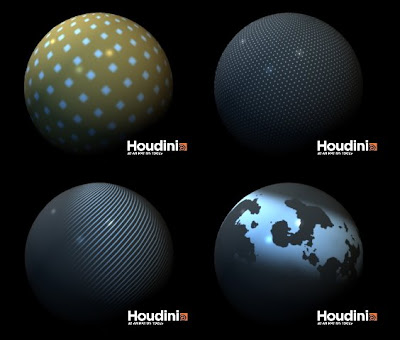
mosaic


heres a sequence of experiments on the mosaic VOP.
i wasnt sure what the "Super Saturate" toggle would do - it only gave .me black renders.

from left to right, top row firsat bottom row second:

default render - just a moisaic VOP joined to the output
the mandril is mapped to every primitive.

some UVs attached to s and t. you can see the mosaic vop doing its thing.
its basically breaking up the image into cells. this could be used for creating cracks in geometry.
wha ? yes - in houdini im convinced these 2D operations can easily be converted to 3D operations through various SOPS. very powerful indeed.

less noise and more cells in the mosaic.
this maths must be very similar to that filtyer in Photoshop - you know the one....pixelate -> crystalise.

but surely this can be more interesting ?
lets try some more things...

how about noise in the normal input ?

lower freq noise in both the normals and the UVs...

lower freq noise in just the UVs but NOT the normals...

low freq noise in the cell jitter


and finally all combined with noise also in the cell border width:

MOLD


I thought this one was interesting. The base material seems to be black. This suggests to me that it could be layered with another material. Ill have to look into layering now as well. :D

marble variation


heres a slight variation on the marble material. I feel if i get to know what the basic shader supplied with Houdini look like - i can more easily build a library of my own, using these as a basis.

Ill endeavor to do some render tests of all of the materials then decide on some shaders ill require to build up for the future.

Thursday, March 20, 2008

pic

STONE VOP net


Here we are again...

OP - VOP of the day !
the stone VOPnet - i say vopnet as there is a nested network involved.

on a side note: i wanted to use the render view / IPR on this one whilst experimenting with the stone parameters. at the top of the pane is a drop down list to choose the render output driver. i had to actually create my own instance of mantra to be able to choose it and start the IPR. where as i could use the default mantra driver to start a normal render - with out laying down another mantra node. - clear as mud ? i digress.

the network that is nested inside the stone VP is the cavities vop. Maybe ill look at that next time. For now its good to note that like alot of H's shaders it involves true displacement. From my humble backgrounds in Max- it was a special case when using displacement because of processing power required - these days it seems old hat.

another very important thing for me to keep in the back of my head is that all these shaders that ship with H, are just examples of what can be done - were not limited to these of course - we can make our own shaders. duh !

The stone shader or VOPnet has a bunch of parameters or controls for the artist to twiddle.
eg stone color...etc... well here you go.


i can customise this - this is really just a template for me.
ie instead of stone colour i could add a bitmap like so.

OP of the day ! the SPLINE VOP

in my thirst for knowledge, ill attempt to write a lil bit about a SOP or OP here and there.
Theres ALOT of ops in H9...so it could take a while. i counted 124 COPS alone !)
ill probably skip over the easier ones...and look toward learning new stuff.

so to break the ice have randomly chosen to look at the spline COP.
ok this one seems tricky because i dont have the math of splines in me...but i get the impression you define a type of spline and give it some input points - then it can retun a nice smoothly interpolated point for you.

so in the simplest example if you gave it two points 0 and 1 and then asked for the midpoint - obviously it would give you .5. This could be handy if you specified interpolation on a nice smooth spline where the point positions aren't so easy to calculate.

the help file refers me to the FIRE VOP example which generates 2D fire by blending some colors.

It talks about Cardinal Splines vs Linear...so i looked into this.
the maths here is a bit full on for me. but a useful link if your into splines and how to plot them.

www.ibiblio.org/e-notes/Splines/Intro.htm

at last something i can read ! from the Microsoft Developer network
(i f you believe anything from MS)

"A cardinal spline is a sequence of individual curves joined to form a larger curve.
The spline is specified by an array of points and a tension parameter. A cardinal spline passes smoothly through each point in the array; there are no sharp corners and no abrupt changes in the tightness of the curve. "

hers some cool java interactive spline demos...or you could just open Houdini :)
www.cs.uu.nl/docs/vakken/ddm/curvedemos.htm

unrelated bbut googling led me to this page with some XSI rigging effots
www.matkovic.com

-------------------------------------------------------------------------------------------------

any how - lets look at the FIRE VOP.
cool !
where in hot hell is a spline used here ? - i see - the color ramp VOP is actually a spline VOP that has been renamed to suit its purpose better as there are several colors that make up the 2D fire being blended together. The interpolation bewteen colours can be a cardinal spline or linear interpolation. the results change visually...and this means more to me as i am more of a visual person :)


On the left is linear interpolation and on the right cardinal spline interpolation. There are some others but i have ignored these as they are related to RSL - renderman shader language...
and i havnt gotten in to those depths yet...

as black is one of the colours or points on the slpine - the flames appear taller in the cardinal pic, as they are being interpolated differently - lust like motion is interpolated differently in a motion graph - if your an animator. hmmm interesting. but how can i use it...maybe a post for another day.

next VOP....stone !

misc notes from work

the bookmarks tab is now hidden on the right of the drop down context menu.

Wednesday, March 19, 2008

made an asset today ! right on it !

I saw Houdini doesn't have a capsule primitive so i made one !

up and running / hello world !

hello world !
hopefully I have time to make this blog worthy.
I plan to record my adventures in houdini here to strengthen
the long hard road to learning this amazing software.
I'll also endeavor to put in a pretty picture or two !

some topics ill touch on to begin with:

  • this software is strange ! how is it really different from max and maya?
  • User friendliness
  • Modeling and proceduralism
  • Texturing
  • project management
  • using linux

personal projects:
  • rigging a toony character
  • moving my personal projects over from max and maya
  • archive of initial houdini dabblings - oh the shame !